Saturday, July 27, 2013

Miniature polymer clay breakfast platter.

This tutorial teaches how to make polymer clay breakfast platter for your Barbie dolls. 

Materials

Polymer clay to make a tray,  teapot and tea cup, bread slices , cutleries , cereal bowl and milk carton. For bread slices we need while and brown, for cutleries either gray or white, for rest of the things you can use the colors that you like.

A roller, a blade , pencil or similar object with a flat bottom .

Clear nail polish for glazing , a conventional oven or a toaster oven to bake. 


Let's get started :

1. How to make a tray :

To make a tray I have mixed different colors like brown, yellow, green etc.  Kneed the clay well so that there are no cracks. Make a 10 1/2 by 4 1/2  inches rectangle. Make bigger rectangle if you need bigger tray. 
     
 
Curve the edges by cutting them slightly .
 
Make a thin strip of about 15 inches to construct walls around the tray. 
      

Take a small piece of clay make two small handles. 


Attach the handles on the opposite sides of the small sides of the rectangle .

  
Now the tray is ready....

2. Tea pot :

Kneed the dough and make three balls, large, medium and small. Also make a thin strip for the spout and the handle. 


Take the large ball and flatten the top and the bottom slightly.
                       
 Next take the medium sized ball and make it flat and this will be the base of the tea pot 


Place the large ball on this base and press gently so they stick together well.


Now take the small ball and flatten it and add a tiny ball on the top. This will be the lid of the tea pot. 
      
     
       Take a tiny amount of white clay and make a tiny ball and place on the top. Once this is done place the lid on the tea pot and press gently .


Now take the tiny strip of clay and make a spout and the handle and attach to the teapot.
    
  If you want you can decorate the pot , I have added polka dots using white.

     
3. Tea cup and saucer.

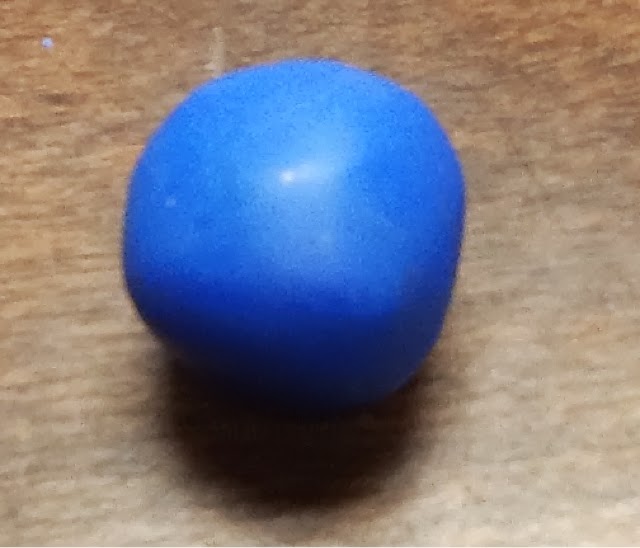
Make two large and one small ball out of the clay you have chosen to make the cup.
Take one large ball and flatten it and with the help of a pencil or some object with a round base make a hole to look like a saucer.


   Next take another large ball and make a cane , and with the help of a pencil make a hole to form a cup. And then take the smaller ball flatten it and attach the cup to the base.


    Now with a thin strip make the handle and attach to the cup. Then you can make polka dots to decorate the cup. 


Finished tea Pot and cup and saucer.
     
 
   If you like you can fill the cup with brown to get the effect of coffee or tea.


4. Plate: 

Take one large ball and flatten the ball. With a pencil make a hole in the middle. Then take a thin strip of clay and construct the walls around the plate. 


  5. Bread slices..

Make a small square using white and with brown clay make wall around the square to look like a bread slice.


6. Cereal bowl : 

Make a large ball and using an object with the round bottom create a hole and shape it like a bowl. I used a wooden toll to create the hole.


  To make cereal I used brown clay and made tiny balls to look like coco puffs .


7. Spoon, fork and knife. 

Using white make a thin tube. With the help of a thin rod create a tiny hole on the top of a spoon..
                                  

Using white make another thin tube and with the help of a Popsicle stick flatten half of the tube and with the help of a blade curve the top of the knife.


  To make the fork again make a tiny tube and attach three stokes of the white clay on the top of the tube. Once the fork is done slightly bend the top to form the shape of a fork .


8. Milk carton : 

Take two cubes , I have used white and blue. It can also be made with just one color. 
      
  Attach one above the other....
         
Make two small rectangles using white and attach on the top of the blue  block to form a roof.

                
   Once the carton is done using white write  'milk' on the carton .
               
   Now the breakfast platter is ready... It looks like this before baking. After every thing is done bake for 15 mins at 275 degree F . Don't bake more than 15 mins. After baking and once it's cooled using clear nail polish paint the entire set and let them dry.


After baking and glazing it looks like this..


Enjoy ......
I hope this tutorial was helpful. Please feel free to leave a comment for any questions or suggestions etc...


Breakfast platter

Hello everyone ,

Yesterday I got an idea to make a miniature breakfast platter to gift someone. It is perfect for Barbie dolls . The set includes a tray, teapot and cup and saucer , a plate with two slices of bread, cutleries , milk carton and a bowl of cereal.

       
I have made a tutorial on this . You can find the entire tutorial here 
 
http://revathiakshay.blogspot.com/search/label/Tutorial.

Enjoy ! 

Tuesday, July 23, 2013

Miniature polymer clay tea set

Greetings friends,

I am in the middle of packing ,since my husband and I are moving to a new place, but my hands were itching to do some crafts even though a lot of work is pending. Unfortunately I have already packed all my yarn, fabric etc.,except some yarn to knit Poly if possible before I move. Only some polymer clay was out so I decided to make a mini tea set with the help of some tips I got from the online tutorials. It was a real fun and I was quite happy with the results. The set consists of a tea pot, creamer, sugar bowl , two pairs of cup and saucers, three spoons, two tea bags, two napkins and a wooden tray.


   The tray is made out of balsa wood. I cut the balsa wood in a tray shape and then  
     constructed the walls with Popsicle sticks. I used wood glue to put them together and painted white using a nail polish. I used a scarp book paper inside the tray like a doily and also to make the tea bags and the napkins. 

  I will surely be making some more of these with different colors and designs. 
 Right now this set is already gift wrapped and ready for gifting ...


   Hope to see you soon with another post... Until then good bye and thanks for visiting :) .

Sunday, July 14, 2013

Doll house furnitures.

Yesterday I also found some more stuff in the same thrift store and they are some wooden doll house furnitures.I was looking for the rocking chair from a long time and yesterday I found the chair finally...


These chairs are perfect for my dolls.. This below piece looks like a kitchen counter or something , I am not sure but it will be perfect for my Gnome family that I am going to knit in near future...


     Other things that I found was some cute little doll baskets .....

                                
     So many things for just under $6 , it was real funning shopping yesterday ..
      

Porcelain dolls...( collectors dolls )

Greetings friends,

This blog is all about collectors dolls. Yesterday was my lucky day. I love to pay visits to thrift stores and goodwill stores once in a while and yesterday I did the Same and it turned out to be amazing.
I found few beautiful porcelain dolls for just $20 . I was just checking online and each doll costs over $100 and I got 30% off on each item. Unfortunately I don't know the names of all the dolls.

      
As you see this is Katie by Linda steel. The doll is in the perfect condition, with the original packing with all the certificate of registration and how to pose the doll instructions. This is from Danbury mint . They manufactures porcelain collectors dolls. 
Katie is deigned by an award winning doll sculptor Linda Steele. The head, arms and legs of each heir-loom quality doll are crafted of fine bisque porcelain and painted by hand. The outfits are meticulously hand- tailored. I think this doll is manufactured in 1991.


This is also a product of Danbury Mint but I don't know the name of this doll. Even this one is in the perfect condition with the certificate of authenticity . Since I will be moving soon I did not want to remove the plastic while taking the picture, I apologize for this..


I don't know the names of the above two dolls as well. I can only say that I had a great bargain. I was quite lucky yesterday. Now I am just crossing my fingers  ,  I hope they don't break when I move ...
Those of you who like to collect dolls the best place to look for them is the goodwill and the thrift stores, we never know what we can find sometimes for great prices...
If anyone who reads this blog  and know the details about these dolls, names, manufacturers and other things please leave a comment, I would love to know more abut these dolls.

Thanks for visiting my blog....

Thursday, July 11, 2013

Kate and her birthday gift....

This blog is about a sweet little girl 'Kate' . She is designed by Wendy Philips . I bought this pattern from her Etsy  shop called dolly time. I love all her dolls and her blog. This is the first time I bought the patterns from her shop. It was easy to follow and I learnt new techniques as usual, especially while attaching legs and arms to the doll and also new way of making the Dolly's hair and facial features. Here is the picture of my sweet little girl Kate.
                              
   So today is a special day for Kate because its her birthday. Kate had a wonderful birthday, her mum cooked her favorite delicacies , her father bought her new skirt and a cardigan , and she is wearing a pair of shoes that matches her skirt. She has been wearing her new dress the whole day and she doesn't want to take them off. Here is the picture of her clothes . Her skirt is made out of fabric and her cardigan is knitted.


  This was not the end of her day.  Guess  what ? she received a surprise gift from her uncle that made her birthday memorable. what was that gift?. A play kitchen set. Kate did not expect this and she jumped with joy because she always loved playing with her play kitchen set with her best friend Poly. This was the best gift that she has ever received for her birthday so far.


 Kate has already opened her package and arranged her new dishes with lot of enthusiasm and excitement.
                           
       
But did this excitement last long? Unfortunately no, since her best friend poly is not yet ready, she cannot play alone without her best friend poly. Hopefully she will get made soon. I am on the verge of moving so lot of things are pending , I would love to knit poly before the move but not sure if I will be able to finish knitting her but I promise Kate that I will try to knit Poly as soon as possible . Till than poor Kate should wait for her mate.


This little story is based on my own story. When I was just 6 or 7 years old my uncle gifted a play kitchen set for my birthday which was totally unexpected. I was really the happiest child that day. I still have those toys with me. So this blog is to just celebrate my childhood. The play kitchen set that's shown here was bought from dollar tree. Sometimes dollar tree can really surprise me :) .

I hope my readers enjoyed this little story of Kate .....
Thanks for stopping by........


Wednesday, July 3, 2013

Mrs. Flora and her home

I recently knitted a tiny topsy-turvy doll from jeangreenhowe 's pattern as usual ,I have no words to describe her work. This is the first time I made this kind of a doll. I love the idea of upside-down dolls. This doll is based on a flower theme...The Buttercup turns into  Daisy  .


I also love the colors she has used , Buttercup's dress is made with gold and Daisy's dress is made with yellow and white. I wish I had a darker yellow shade but unfortunately I did not have....


So after making these wonderful dolls , I have to come up with a story so I came up with this story . I named these  topsy's as Mrs. Flora, and I created a beautiful home for her ,here is the sneak peak of the story..


So let's begin the the detailed story of this lovely family....
Mrs. Flora is a homemaker and a wonderful mother, she always keeps her home neat and tidy. She loves making things for home , she has sewn the curtains herself, she has made beautiful cushions for her home etc....

 She loves spending time in her sun room during the day. She loves flowers and her dresses are always made based on some flowered theme. The living room is connected to the Sun room.  This is the sun room..


She has fancy mushrooms , sun flowers and some flowers in her sun room.Mrs Flora likes to have her afternoon tea here and after she has her tea she waters the plants,while Mrs. Flora is busy with these things baby Tiny likes to sit in the sun room as well and he enjoys playing with his favorite Humpty-Dumpty toy. Mrs. Flora has knitted this toy herself for the baby...Today Mrs. Flora has dressed like a butter cup.
This evening her husband is taking her out to some fancy restaurant and she has already planned what is will be wearing ....


She has decided to wear her white and yellow gown and look like a daisy , she is also wearing daisy flowers and she looks beautiful , the husband is quite delighted by her looks :)


While Mum and Dad are having a nice time in some fancy restaurant , grandma is watching the baby. Grandma enjoys spending time with Tiny , and Tiny loves grandma's  company as well :) 


The grandma and the husband has already appeared in 'The little red riding hood ' story. I used the same dolls for this story . The patterns are for Fiona Goble's Fairytale knits. I bought tiny from Target for $3. Humpty-Dumpty toy is knitted from jeangreenhowe ' s book. The flowerpot and the flower is crocheted. The green chair in the Sun-room is made out of a cardboard gift box and Popsicle sticks. I used a decorative paper to cover the cardboard box. The cushion is made out of felt . I found those decorative mushrooms from a book store I have stuck them on a cardboard .

The couch in the living room is made with the felt and fabric. I first made two rectangles  out of felt , then stuffed them with the poly fill then I covered the cushions with the fabric . 

I made the fireplace with the cardboard gift box, covered it with a decorative paper which looks like bricks. The brass bucket next to the fireplace was purchased from an antique store. The logs inside the brass bucket are just the match sticks. The fire inside the fireplace is made out of yellow and orange felt.The floor is also just a decorative paper which looks like wood. 
With the cardboard gift box lids I made the window and the television ( I hope it looks like a TV :) ) . On the TV screen I just stuck two cartoon pictures and made it look like a Disney channel. 

The curtains and the carpet are made from the paper doilies . I have just used a folder for the walls...

I had a great time creating this lovely family room. It took me a while to make all these but it's totally worth it . When I have spent a lot of time knitting these dolls creating a proper background is very important. I am not a very good photographer but i believe that there is always room for improvement. The best part is this is very portable. After playing with these I can just close the folder and place the folder in the bookshelf till I need it for the next time...

Now i guess its time to end this post and to say thanks for those of you who stopped by to read my blog. Hope to come up with a new story soon till then good bye :)