Thursday, February 12, 2015

Dasara in a Dolls' House.

Greetings!


This year I want to concentrate more on 'Indian Dolls' showcasing my culture and traditions and festivals. Every year in the month of October or November we celebrate a festival called 'Dasara' or 'Navarathri' (meaning 'Nine Nights').  The festival is celebrated for a period of nine days and on the tenth day we celebrate 'Vijayadashami'. This is the most auspicious day of all. It was the day on which evil was destroyed by good. Auspicious occasions like weddings, new business ventures, etc take place on this day. Dasara is celebrated in a different way, in different parts of India, I am from Karnataka and I will describe how we celebrate 'Dasara' or 'Bombe Habba' (meaning Doll Festival)......

This is one of the fascinating festival for ladies and young girls, since it involves displaying and decorating dolls and figurine for all those nine days. The dolls include everyday scenes, religious dolls from the two great epics of India 'Ramayana' and 'Mahabharata', miniature utensils, weddings, royal court life, wooden toys and anything that a girl plays. Some enthusiastic people even make a model of a park or a forest and display animals etc....

Every Brahmin woman gets a pair of wooden dolls(male and female) in her wedding from her parents, called 'Pattada Gombe' which are generally made of teak or sandalwood. It is compulsory as a part of tradition to dress these dolls using fabric or color paper like a bride and bride groom and display them every year along with the other dolls during Dasara. It seems that in ancient times these dolls were representative of local king and queen, people prayed for their long life and prosperity of the kingdom. In front of these dolls we place two 'Kalasha's' (two small silver or copper pots, filled with water, coconut, and beatle leaves, which is considered very auspicious. I made these wooden dolls out of yarn. I had to make these very tiny so I knitted them using zero knitting needles and fine yarn. I am not very happy the way they have turned out but I can live with it for now :).


On fifth day we celebrate 'Saraswathi Puja'. Goddess Saraswathi, is considered the Devine source of knowledge and enlightenment. Books and musical instruments are placed in front of the dolls and children offer prayers to seek knowledge. I made 'Veena' the musical instrument that's played by goddess 'Saraswathi'. I looked through my junk pile and found some interesting beads and other things to make this instrument :)............


We draw  'Rangoli' in front of these dolls. 'Rangoli' is a folk art from India, in which patterns are created on the floor in living rooms or courtyards using materials such as colored rice, flour, flower petals, chalk....drawing 'Rangoli' in front of the house is sacred and it's our tradition. It is believed that by drawing this we are welcoming goddess 'Lakshmi', the goddess of wealth.
We light the lamps in front of these dolls, light the incense sticks, and offer fruits and other delicacies, that are prepared to the God along with the flowers. In the evenings we invite ladies and little children to see the dolls and we exchange sweets and other offerings like fruits etc., which is called 'Bombe Bhagina'. Little girls dress up for the occasion and carry a little bag to collect sweets and gifts from their neighbors. Devotional songs and hymns will be sung.


On the evening of the tenth day, any one of the dolls is put to sleep and the Kalasha is moved a bit towards north to mark the end of 'Dasara'. All the dolls will be packed up until next year. Doll collection is one of the greatest hobbies among the ladies. Every year they buy new set of dolls, and the collection grows year after year.

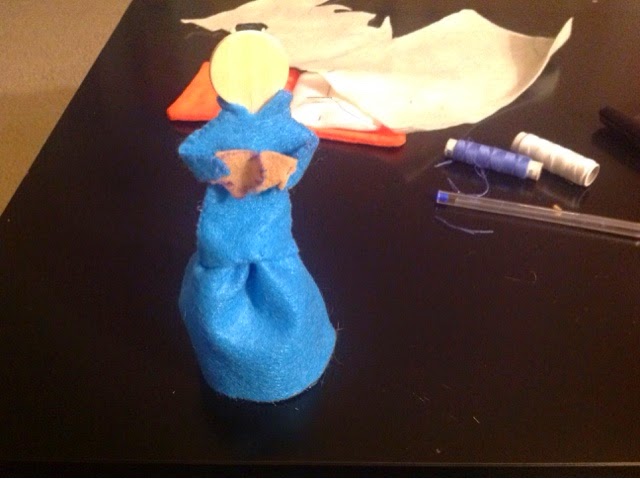
I made a miniature version of 'Dasara' even though Dasara is quite far off, I thought of making it since this idea was fresh on my mind..... I even made a room box to arrange every thing. This whole set was created out of my imagination, except for those felt dolls which I borrowed from Kath Dalmey's 'Dolls' House Details' and the 3-D paper garden was inspired from the book 'Paper in three dimension' by Diane Maurer-Mathison. I on,y made some changes to the garden by adding a cottage....


I made some clay folks as well....


Over all I am quite happy to show that Dasara can be celebrated quite elaborately even in a'Dolls' House'............last but not the least want to share my favorite pic.... I love the girl's tote :)......


Will be back soon with my next project ;)....
Revu!


Saturday, January 17, 2015

Makara Shankranthi

Greeting!
January 15th we celebrated 'Makara Shankaranthi' in India.  This is the Suggi or harvest festival for farmers of Karnataka. On this auspicious day, young females (kids and teenagers) wear new clothes to visit near and dear ones with a Sankranti offering in a plate, and exchange the same with other families. This ritual is called "Ellu Birodhu''. Here the plate would normally contain "Ellu" (white sesame seeds) mixed with fried groundnuts, neatly cut dry coconut and fine cut bella (jaggery). The mixture is called "Ellu-Bella". The plate also contains sugar candy moulds of various shapes (Sakkare Acchu) with a piece of sugarcane. This festival signifies the harvest of the season, since sugarcane is predominant in these parts.


In some parts of Karnataka, a newly married woman is required to give away bananas for a period of five years to other married women from the first year of her marriage, but increase the number of bananas in multiples of five. There is also a tradition of some households giving away red berries "Yalchi Kai" along with the above. In North Karnataka, kite flying with community members is also a tradition. Drawing rangoli in groups is another popular event among women during Sankranti.

An important ritual is display of cows and cattle in colourful costumes in an open field. Cows are decorated for the occasion and taken on a procession.

This is my first project for 2015 and I am quite happy to start the year with this auspicious project!

Will be back soon with my next project.........

Revs!

Sunday, December 21, 2014

Nativity Scene.


Greetings!

After making some fun and jolly Christmas dolls, I thought of making something religious. I wanted to knit 'Nativity set' from Jean Greenhowe's book, but I don't have time to knit before Christmas. So I thought of this idea, to make a quick 'Nativity Scene'. 
I had purchased some wooden craft sticks from JOANS long time ago. I used those craft sticks and felt to make this 'Nativity set'. 
It takes less than an hour to make one figure. I have also made the tutorial and you can find the tutorial here, on my blog, under tutorials.


In the first picture Mary and Joseph standing with the baby Jesus, the shepherd and his sheep joins them in the second picture and later in the third picture, The Three Wise-men joins them with some gifts and presents!
Finally, the complete 'Nativity Scene' is ready....
It was quite a joyful experience to come up with this idea. I hope you will have fun making these, even though there's just four days left for 'CHRISTMAS EVE'!
Happy Holidays!!!

Nativity Set, Tutorial.

Tutorial ..

I made this tutorial in a hurry. My Rascal cat 'Magster' kept disturbing me through out the tutorial. 

I hope this tutorial is helpful. (Please donot post this tutorial as yours).
Enjoy! 

Let's get started:

Mary:
Materials:
Craft stick or a wooden ice-cream stick.
Blue and white felt, and little bit of flesh color felt
Black permanent marker
Needle and thread to sew.

Method:
1. Cut Nine and half by three and half inches of blue felt for Mary's skirt.

2. Make a gather skirt, place the skirt on the craft stick below the waist and pull up the gathers tightly. Sew the raw ends together. This seam will form the back of the skirt. Arrange the gathers neatly so that the figure can stand well.


3. Cut a basic bodice shape from two layers of blue felt. It need not be perfect. I have not taken the measurements, just cut the felt based on the size of your craft stick.

4. Cut the neck to form a slight round shape. Cut slightly near the arm holes to give a shape to the bodice. Join the row ends near the shoulders. Put the bodice piece on the craft stick through the head. Join the rows at each end from arm hole till the waist and sew the front and back of the bodice to the skirt.


5. Cut a small piece of rectangle approximately 4 by 2 and half inches. Fold the piece in half, place this piece near the arm hole and sew around the arm hole and join the row ends of the sleeve, this seam will go below the hand. Repeat the same thing for the other hand.
6. Using flesh color felt, and keeping this diagram as guide cut two hand pieces, and sew them in place.


7. Using white felt cut a length of rectangle for the veil, which should be long enough to go around the head and fall below the waist.


8. Place the veil on the craft stick as shown in the picture and fold the felt little bit near the top of the head and sew in place, also catch the veil, near the shoulders as shown in the picture.
9.with the black permanent marker, mark the hair and the facial features.
10. Bring the hands near the chest, and sew in place.

Joseph:
Materials,
Mustard color, flesh and white felt.
Craft stick
Brown Mohair yarn
Glue
Black permanent marker 
Sewing thread and needle

Method:
1.Make the skirt and join the bodice piece as far Mary, using mustard color felt. You can cut the skirt piece little bit shorter than Mary, since we don't need too many gathers, but make sure that the figure stands well. Do not make the sleeves at this point.

2. Using white felt and keeping the diagram as a guide mark the shape of the cloak and cut it out. Join the row ends near the shoulders and place the cloak around the figure, noting that the open sides will come in the front. 


3. Now make the sleeves as far Mary, using the white felt. Catch the front of the cloak on either sides from the shoulders below till the waist.
4. Attach the hands as far Mary, and bring the hands together to the front and sew in place as shown in the picture.

5. Using the mohair yarn, stick the hair and the beard, if you do not wish to use the yarn, the hair and the beard can be painted using brown permanent marker.


6. Using black marker, mark the facial features.

Shepherd:

Materials:
Dark and light brown felt and cream felt (for hands)
Craft stick
Pipe cleaner 
Glue
Permanent marker
Sewing thread and needle.

Method:
Make the figure as far Joseph. Use light brown for the gown and dark brown for the cloak. Make the hands using cream felt.
Cut six and half inches of brown pipe cleaner, if you do not have brown, use white pipe cleaner and paint it brown using the permanent marker.
Fold the pipe cleaner at the top to form a stick, place the stick near the hand sew in place as shown in the picture.
Mark the hair and the facial features using the black and the brown permanent markers
For the head cloth, cut a piece of light brown felt in a 'U' shape and place the cloth around the head and catch the sides, as shown in the picture.

The Three Wise Men.

Materials:
Three different color printed felt for the gown, contrasting three different plain felt for the cloak and the head dress.
Three Craft sticks
Glue
3D 'Gift' stickers
Sewing thread and needle
Permanent marker.

Method:
Make the figures as far Joseph. Use printed felt for the gown and plain felt  for the cloak. Make the hands using cream felt.
Bring the hands to the front and sew in place. Stick the 'Gift' stickers in the front as shown in the picture.
For the head dress cut the felt in different shapes like cone, rectangle etc. join the ends and apply some glue and place the hat in place.
Mark the facial features.

Baby Jesus:

Materials:
Light pink or light yellow small Pom-Pom or a small wooden bead for the head
Small rectangular piece of cream or white felt for the body.
Small piece of white felt for the hood
Small quantity of stuffing
Permanent marker, brown and black.
A matchbox tray for the Manger.
Four three inches Popsicle sticks for the stand.
Two push pins
Glue
Some dry grass.

Method:
1. Using the rectangular piece of felt, form a tube and sew the row ends. Place the Pom Pom on one open end and sew in place. 


2. Stuff the tube slightly through the other open end and close the opening.
3. Use the hood piece and place the piece on the head and sew in place, catching at the sides and at the back.
4. Mark the facial features.
5. To make the manger, color the matchbox tray brown. Put some dry grass and place the baby inside.

6. To make the stand, take two pieces of Popsicle sticks and apply some glue and form a cross shape, repeat the same thing form the other side. Push a push pin on both the pieces and glue the push pins. After the glue is dry, place the manger on top of this.


Sheep:
Materials:
White felt
White pipe cleaners
Stuffing
Permanent marker 
Sewing thread and needle 

Method:
Using two layers of white felt, draw an animal shape and sew all around , leaving the top open for stuffing. Turn right side out and stuff. Close the opening after stuffing.


Cut two small pieces of white pipe cleaners and fold them in 'V' shape and sew them in the front and at the back as shown in the picture.


Cut two small 'U' shapes for the ears and small piece for the tail using white felt and sew in place.
Using black marker mark the eyes and the nose.


Christmas Ornaments.

Greetings!

I just finished some more quick, fun and little gifts. I made Elves 'carol singers', little dress and a jumper Christmas tree ornaments  out of felt. The dress and the jumper pattern were from the website called 'Ric-Rac', it's a free pattern. I found the Christmas Elves pattern from Taradennis.com. I made these to gift some people in my gym.
I surely had a lot of fun making these!!


Happy Holidays!
Revs.....

Wednesday, December 10, 2014

Small Santa.....l

Greetings!

I finally finished knitting 'Santa' so he is ready to ride his sleigh. Last year I knitted a big Santa. This year I made a small one, so that he can fit inside the sleigh. 


Last year Mrs. Claus was not ready before Christmas and Mr. Claus and my other dolls were busy posing in a showcase of a library. So did not get a chance to take a picture of this lovely couple..........Finally their 'Family portrait' is here. 


Now I have to work on my other incomplete project..........
Happy Holidays!!!!!

Saturday, December 6, 2014

Easy Christmas Door hangers.

Greetings!

Couple of knitting projects are in work in progress, meanwhile I just made these cardboard door hangers to gift some people. They are easy, quick and fun to make. Also they make cute Christmas decorations. I used felt, fabric, yarn, and a pair of old holiday socks to make these. I am planning to make some more :)


Happy Holidays!!!!