Wednesday, January 29, 2014

Miss. Polka Dot


Greetings! Crafters ,

This is a very special post since this post is all about me. It's about my first attempt to design a doll and I am quite happy with the results. Meet this little girl ' Miss Polka Dot '. This was the obvious name I could come up with, could not get any interesting name so far.


 It was quite an interesting challenge. Every time I start knitting a doll I actually know how the doll will turn out , since I have the pattern and the dolls's picture,but when I started this doll I had no idea how it will turn out. I referred the books of other designers to get the idea about the size, gauge, to know how others have gone about to get a particular shape etc.

Unlike sewing where we can just cut the fabric to a desired shape, designing something with yarn is quite challenging. We should actually knit or crochet to attain a desired size, length, shape etc.

I found it quite hard when it came to the facial features and the doll's hair. I had to redo the doll's face two or three times. The dress, the hat and the shoes are attached to the doll. In future I have to design a removable attire and shoes for the doll which will be even more challenging and I have still not reached that stage I guess. The Dolly's dress is based on the red dress that I had when I was a little girl. That was my favorite frock and I had named the dress as a 'Balloon Frock' which I had purchased against my mother's wish, since the frock was above the knee my mother did not like it but I did not care for what she had to say and bought that frock which I always preferred  to wear when we went out. I liked the idea of polka dots and the sleeves of the dress.

 I have a red throw with white polka dots and that gave me an idea to make the polka dots on the frock. 


I tried to make her hair curly this is again to show something about myself. I have curly hair and when I was a kid my mum use to tie to ponytails and they use to look like balloons, and everybody use to love my hair. Through my dolls I am able to bring back my childhood days over and over again. 
I was not sure if the doll required a hat or no but I finally thought of making a hat and I feel the hat suits the doll. Overall it's a simple doll which is about 9 1/2" tall approximately excluding the hat. The doll can stand and sit. 


This doll is inspired by an illustration that I came across from a children's book which I will be reveling in my future blogs. 

I haven't written the pattern yet but meanwhile I am planning to design Polka Dot's two other friends and then I will start writing the patterns. I hope I will be successful in implementing my ideas.
Will be back soon with my next doll...

Regards,
Revathi.....


Tuesday, January 21, 2014

Mrs. Claus


Finally Mrs. Claus is ready wearing the holy leaves and the holy berries around her bun. A candy cane in her her heart shaped pocket, a red shawl wrapped around her shoulders, with her striped skirt and her rosy cheeks Mrs. Claus looks very lovely. Before Christmas I could only finish Santa, now his paramour is ready. Mrs. Claus now taking a break from knitting and having a cup of tea while she waits for her  dear husband to return home. 


Mrs. Claus is also Jeangreenhowe's creation from her book called 'Christmas Special'. 
I wanted to make a scene with Santa and Mrs. Claus together but Santa is at the Dallas public library in a showcase getting all the attention from the public, and will be back only by the end of this month. Till then Mrs. Claus should wait for her husband patiently . 

I broke the skewers into a desired length and glued two beads at the end of the skewer to make the knitting needles. The bamboo basket was purchased at a thrift store in Davis. I put some lion brand bon-bon's ( yarn balls ) into the basket.  

Maybe after Santa returns home I might make a scene with both of them together.

Till then I guess Mrs. Claus alone is enough to entertain us.

Tuesday, January 7, 2014

First exhibition of my dolls.

This whole month I will be displaying my dolls in Renner Frankford Dallas library. This is the first exhibition of my dolls. I hope my dolls will love this new place and will enjoy all the attention that they receive :) 


Many kids visit the library and I guess these dolls can make them smile. Already a little Japanese girl was admiring all my dolls and her favorite was bunny family. She is just 2 years old but observed every thing so closely. Her mom's favorite was grandpa and grandma. I felt happy to talk to people about my dolls. 

Some lady spoke to me and was surprised to know that I made these dolls because she thought I am just 16 years old :) . I look 16 that's a nice complement . Always girls want to look 18 and not more than that . The librarian asked me to conduct some workshops in the library, I am more than happy to do that. 

Well, it was fun to arrange them in a show case and I am going to miss all my dolls for a month. 

Wednesday, January 1, 2014

Doll house felt dolls, tutorial by Poly and Kate


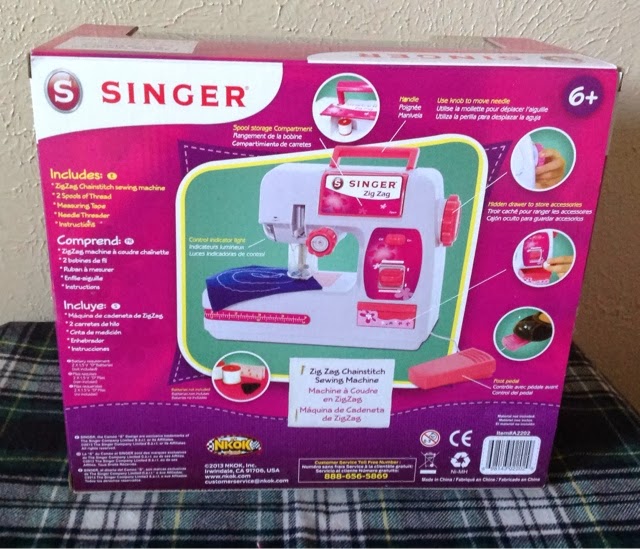
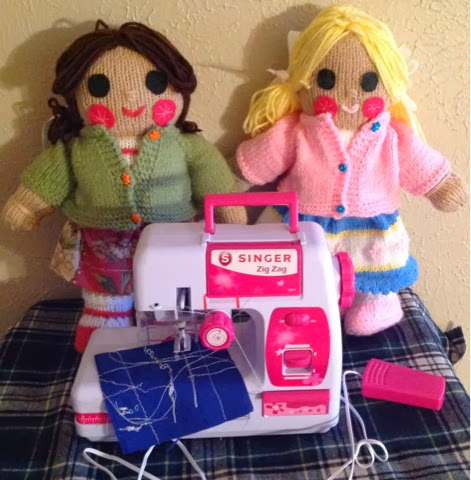
Poly and Kate had been to Walmart recently to buy a sewing machine. Among all the bigger sewing machines they found a small sewing machine for kids by Singer . They were very happy. This machine is perfect for children and for adults to do some small projects. Perfect for children to learn how to use a sewing machine. 


This Machine is very light and handy, it has a handle for convenience and a small draw to store a spool of thread, needle, measuring tape etc. They have also given a small cute measuring tape, which is perfect for Poly and Kate. This comes with all the instructions , but this machine doesn't include batteries. It's a battery operated sewing machine.


Now that they bought a sewing machine they decided to make some dolls for their doll house. Few days ago they had come across some beautiful printed felt at Michael's so they decided to buy all the required materials from there. 
Here's what they needed:
1. Felt ( plain and printed. Brown felt for body, printed felt for the doll's dress, colors to match the doll's shoes)
2. Matching thread and needles
3. Show buttons (optional)
4. Piece of card board
5. Yarn ( to make doll's hair)
6. Ribbons to tie the hair.
7.Poly fill for stuffing.
8. Permanent marker to mark the facial features.

After they went home, they got busy with their project. They put out all the pieces of felt they had purchased earlier. 

Poly selected the felt while Kate started making the measurements. 


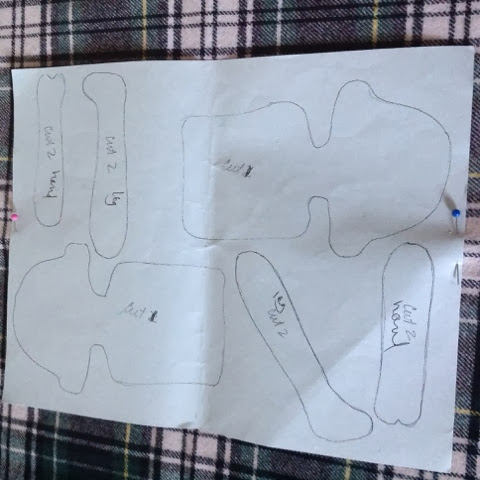
After they decided the size of the doll, they started sketching the pattern.

The first sheet includes the pattern to make doll's body, hands and legs.

The second sheet includes the pattern to make the skirt, top and the shoes.


When they were ready they cut the felt according to the pattern, then started sewing .


They first started sewing the body first , once they sewed the head and the body ,they sewed the legs and the hands. 
Now they turned the body right side out and stuffed some poly fill inside the doll's body. They repeated the same thing for legs and hands. 
Now they attached the legs and hands to the doll's body. 

Next It's time to make a wig for the doll. 
For this they wound the yarn on a piece of cardboard ,


 when they got the desired length and thickness they sewed the wig at the top using a matching thread and cut the yarn at the bottom and they trimmed the yarn to an equal length. 


After the wig was ready they placed the wig on the doll's head and sewed in place. Then they tied a piece of ribbon for the ponytails.
They took a permanent marker and marked the facial features.(other option they thought was to embroider the facial features, which Kate did for her doll)

Now they made the skirt and the top according to the pattern turned the skirt and top right side out and sewed on the doll's body. They sewed some fancy buttons for the top. They cut out the shoes and sewed on the Doll's legs.

Poly and Kate are now done making their dolls, and they are quite happy the way the dolls look. 

They are going to make many more dolls for their doll house. 

Until next time,
Good bye,
Poly and Kate and their two little dollies.


( Note: the pattern for the red dress is not given. I just cut the felt in shape of a dress and sewed directly on the doll's body. The dolls in this tutorial are 5" tall and 2" wide. I am not sure if you can print out the actual size from the pattern that I have given, but they are easy to sketch into different sizes. My dolls are slightly smaller than what's in the pattern. These dolls can be made even with out a sewing machine.)